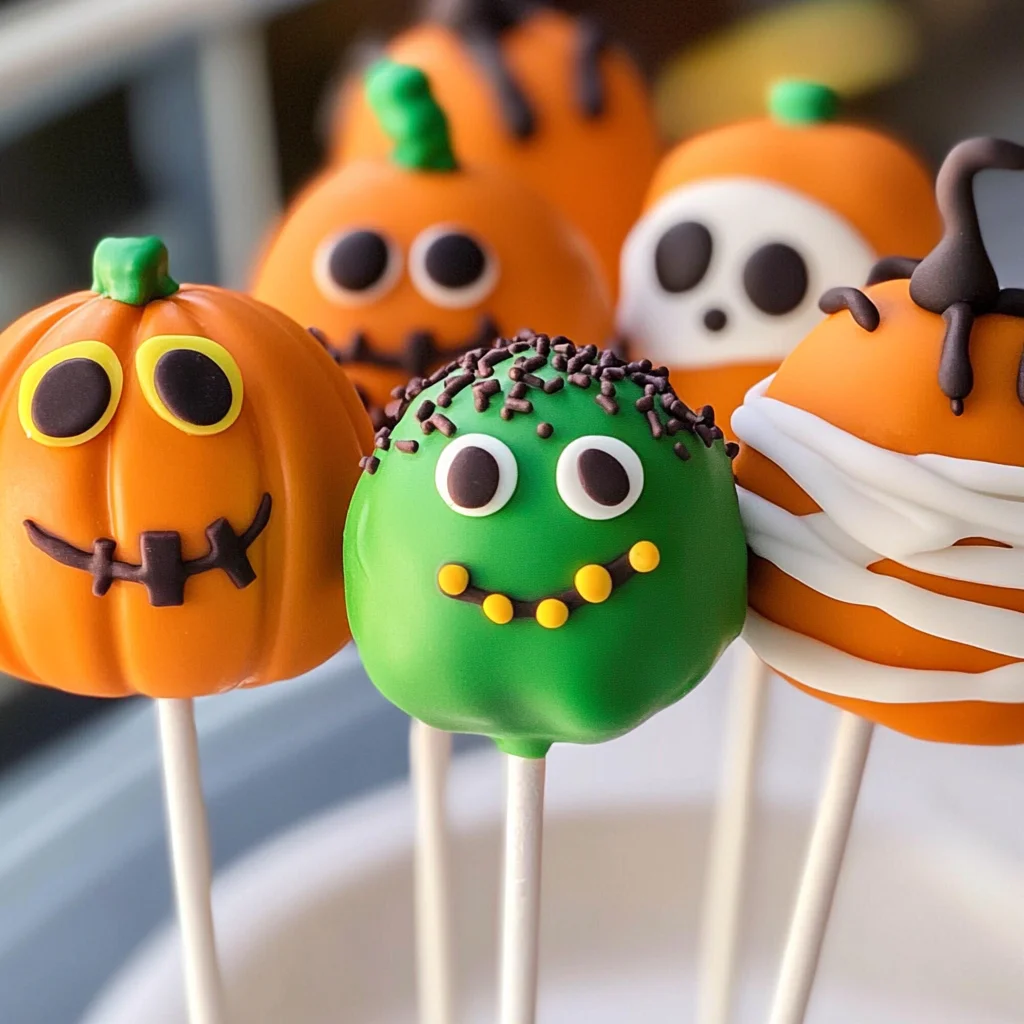
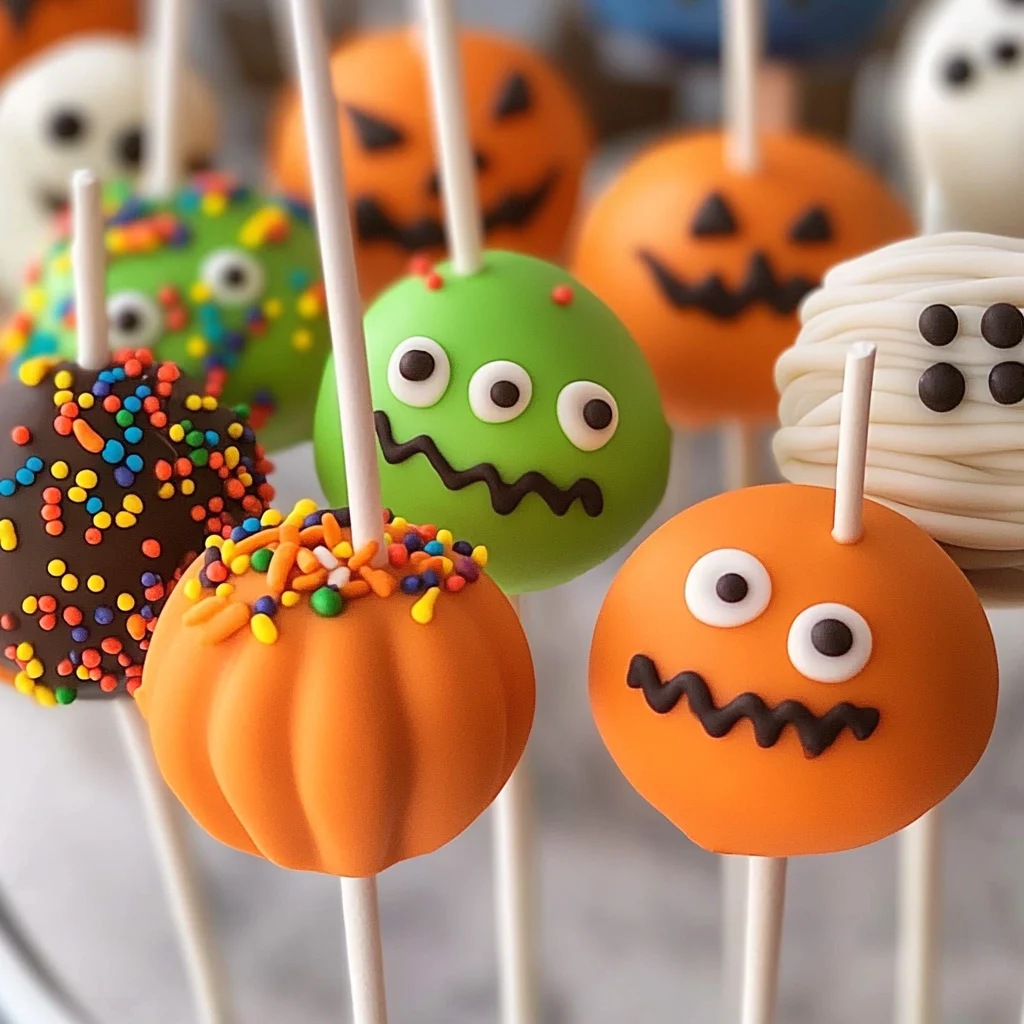
Halloween Cake Pops
Add these spooky cake pops to your next Halloween party. Made with vanilla or chocolate cake, these bite-sized treats can be decorated in various ghoulish ways, including a Pumpkin, Frankenstein, and a Mummy. Perfect for Halloween gatherings, they’re sure to delight both kids and adults alike!
Why You’ll Love This Recipe
- Easy to Make: This recipe requires simple ingredients and minimal steps, making it accessible for bakers of all levels.
- Customizable Designs: You can decorate these cake pops in a variety of spooky styles, perfect for any Halloween-themed event.
- Perfect Party Treats: These cake pops are easy to serve and eat, making them ideal for Halloween parties and gatherings.
- Delicious Flavors: Choose between vanilla or chocolate cake, ensuring there’s something for everyone’s taste.
- Fun Activity: Making cake pops can be a fun activity for families or friends to enjoy together during the spooky season.
Tools and Preparation
To make your Halloween Cake Pops successfully, you’ll need some essential tools. Having the right equipment can simplify the process and enhance your baking experience.
Essential Tools and Equipment
- Mixing bowls
- Electric mixer
- 13 x 9 inch baking pan
- Measuring cups
- Rubber spatula
- Microwave-safe bowl
Importance of Each Tool
- Electric mixer: Speeds up the mixing process, ensuring a smooth batter without lumps.
- Microwave-safe bowl: Ideal for melting Candy Melts evenly without burning.
Ingredients
Add these spooky cake pops to your next Halloween party. Made with vanilla or chocolate cake, decorate these bite-sized pieces of cake for Halloween including a Pumpkin, Frankenstein, and a Mummy.
For the Cake
- 1 box Favorite cake mix
- 1 3.4 oz box instant pudding mix
- 4 eggs
- 1 cup water
- 1/3 cup vegetable oil
For the Frosting and Coating
- 1 cup Frosting
- Candy Melts
For Decoration
- Toppings – sprinkles, candy eyes
How to Make Halloween Cake Pops
Step 1: Preheat the Oven
Preheat your oven to 350°F. Spray your 13 x 9 pan with vegetable pan spray to prevent sticking.
Step 2: Prepare the Cake Batter
In a large bowl, combine the cake mix, pudding mix, eggs, water, and oil. Beat at medium speed for about 2 minutes until well mixed. Pour the batter into the lightly greased cake pan.
Step 3: Bake the Cake
Bake for 30-40 minutes or until a toothpick inserted in the center comes out clean. Allow the cake to cool in the pan for about 10 minutes before transferring it to a wire rack.
Step 4: Crumble the Cake
Once cooled, crumble the cake in a large bowl using your hands until no large chunks remain. You can easily crumble it using two forks as well.
Step 5: Mix with Frosting
Add frosting to the crumbled cake mixture. Use your fingers to mix until everything is well combined and holds together nicely.
Step 6: Form Cake Balls
Shape the mixture into small balls of desired size (about one inch in diameter).
Step 7: Chill the Cake Balls
Place the formed balls on a tray and chill in the refrigerator for at least 2 hours to let them harden.
Step 8: Melt Candy Melts
Melt Candy Melts in a microwave-safe bowl using 30-second intervals at half power or on a stovetop until smooth.
Step 9: Insert Sticks
Dip each stick into melted Candy Melts before inserting them into chilled cake balls. Allow them to set; you can place them in the freezer for faster setting (about 20 minutes).
Step 10: Coat with Candy Melts
Wait until candy is completely firm before dipping each pop completely into melted Candy Melts.
Step 11: Decorate
Sprinkle on your decorations such as chopped candy or sprinkles while still wet before they dry completely.
Now you’re ready to serve up some fun with these delightful Halloween Cake Pops! Enjoy making this festive treat that will surely impress your guests!
How to Serve Halloween Cake Pops
Halloween Cake Pops are a delightful treat that can add a fun touch to your Halloween festivities. These charming bite-sized cakes can be served in various ways to impress your guests.
At a Halloween Party
- On a Dessert Table: Arrange the cake pops on a spooky-themed dessert table alongside other Halloween treats for an eye-catching display.
- In Individual Treat Bags: Place each cake pop in a clear bag tied with festive ribbon for easy grab-and-go snacks.
As Party Favors
- Gift Sets: Package several cake pops together in a decorative box as party favors for guests to take home.
- Personalized Tags: Attach personalized tags with each guest’s name for an extra special touch.
For Kids’ Events
- Fun Activity Station: Set up a decorating station where kids can add their own spooky touches to plain cake pops.
- Themed Plates: Serve the cake pops on themed plates featuring ghosts, pumpkins, or other Halloween characters.
How to Perfect Halloween Cake Pops
Creating the perfect Halloween Cake Pops requires attention to detail. Here are some tips to ensure success.
- Use Fresh Ingredients: Always use fresh eggs and high-quality frosting for better taste and texture.
- Chill Properly: Make sure to chill the cake balls thoroughly before dipping them in melted Candy Melts; this helps maintain their shape.
- Melt Candy Melts Smoothly: Heat Candy Melts in short intervals, stirring in between, to avoid burning and achieve a smooth consistency.
- Decorate Immediately: Sprinkle decorations on the melted candy coating while it is still wet for better adherence.
- Experiment with Flavors: Consider adding different extracts like vanilla or almond for unique flavor profiles.
- Store Correctly: Keep leftover cake pops in an airtight container at room temperature or refrigerate if needed to preserve freshness.
Best Side Dishes for Halloween Cake Pops
Pairing side dishes with your Halloween Cake Pops can enhance your dessert table. Here are some delightful options.
- Spooky Fruit Salad: A mix of seasonal fruits like oranges, apples, and grapes, garnished with ghost-shaped marshmallows.
- Witch’s Brew Punch: A refreshing beverage made from fruit juices and sparkling water, served in cauldrons or spooky glasses.
- Cheesy Spider Web Dip: Cream cheese blended with herbs and topped with olive ‘spiders’ for a creepy dip that pairs wonderfully with crackers.
- Monster Veggie Platter: An assortment of colorful veggies arranged to resemble monsters, served with hummus or ranch dressing.
- Ghostly Guacamole: Smooth guacamole shaped into ghost figures using sour cream eyes; perfect for dipping tortilla chips.
- Pumpkin Patch Deviled Eggs: Classic deviled eggs tinted orange and decorated with chives for a pumpkin look; they add a savory balance to the sweets.
Common Mistakes to Avoid
Avoiding common mistakes can make your Halloween Cake Pops turn out perfectly. Here are some pitfalls to watch for:
- Skipping the chilling step: Not chilling the cake balls can lead to a messy coating. Always chill them for at least 2 hours before dipping.
- Using too hot melted chocolate: If the candy melts are too hot, they can cause the cake pops to fall apart. Melt them slowly and let them cool slightly before dipping.
- Not using enough frosting: Insufficient frosting can make it hard to form cohesive cake balls. Ensure you mix in enough frosting until the mixture holds together well.
- Neglecting decorations: Skipping fun toppings makes your cake pops less festive. Get creative with sprinkles and candy eyes to enhance their spooky appeal!
- Overbaking the cake: Overbaking can dry out the cake, making it hard to crumble. Keep an eye on the baking time and do a toothpick test for perfect results.
Storage & Reheating Instructions
Refrigerator Storage
- Store in an airtight container for up to 5 days.
- Place parchment paper between layers if stacking to prevent sticking.
Freezing Halloween Cake Pops
- Wrap each pop in plastic wrap or foil before placing them in a freezer-safe bag.
- They can be frozen for up to 3 months; just allow them to thaw in the refrigerator before serving.
Reheating Halloween Cake Pops
- Oven: Preheat at 350°F and warm for about 5-10 minutes; this keeps them moist.
- Microwave: Heat on low power for about 10-15 seconds; avoid overheating.
- Stovetop: Use a covered pan on low heat; check frequently to avoid melting.
Frequently Asked Questions
Here are some common questions about Halloween Cake Pops that might help you:
Can I use different flavors for Halloween Cake Pops?
Yes! You can use any flavor of cake mix you prefer, such as red velvet or lemon, for a unique twist.
How do I decorate Halloween Cake Pops?
Use melted candy melts as glue for sprinkles, candy eyes, or edible glitter. Get creative with your decorations!
What is the best way to transport Halloween Cake Pops?
Transport them in a sturdy container lined with parchment paper. Make sure they’re secured so they don’t move around during travel.
How long do Halloween Cake Pops last?
Halloween Cake Pops can last up to 5 days in the refrigerator and up to 3 months in the freezer if stored properly.
Can I make these ahead of time?
Absolutely! You can prepare and decorate your Halloween Cake Pops a few days ahead of your event. Just store them correctly!
Are there vegan options for these Halloween Cake Pops?
You can substitute eggs with applesauce or flaxseed meal and use dairy-free frosting and candy melts for vegan-friendly cake pops.
Final Thoughts
These delightful Halloween Cake Pops are not only fun but also versatile, allowing you to customize flavors and decorations according to your preferences. Perfect for parties or gatherings, they bring a festive touch that everyone will love. Try making them today!
Halloween Cake Pops

Add a spooky twist to your Halloween festivities with these delightful Halloween Cake Pops! Made from moist vanilla or chocolate cake, these bite-sized treats are easy to make and can be decorated in various ghoulish styles, including pumpkins, mummies, and Frankenstein monsters. Perfect for parties, they appeal to both kids and adults alike, making them an irresistible addition to your dessert table. With simple ingredients and fun decorating options, these cake pops can become the highlight of any Halloween gathering. Enjoy a fun baking activity with family or friends while creating these festive treats!
- Prep Time: 20 minutes
- Cook Time: 40 minutes
- Total Time: 1 hour
- Yield: Approximately 20 servings 1x
- Category: Dessert
- Method: Baking
- Cuisine: American
Ingredients
- 1 box favorite cake mix
- 1 3.4 oz box instant pudding mix
- 4 eggs
- 1 cup water
- 1/3 cup vegetable oil
- 1 cup frosting
- Candy melts (for coating)
- Toppings (sprinkles, candy eyes)
Instructions
- Preheat oven to 350°F and prepare a 13 x 9 inch baking pan.
- In a large bowl, mix the cake mix, pudding mix, eggs, water, and oil until smooth. Pour into the prepared pan.
- Bake for 30-40 minutes until a toothpick comes out clean. Cool for 10 minutes before transferring to a wire rack.
- Once cooled, crumble the cake into fine pieces in a large bowl.
- Mix in frosting until well combined and holds together.
- Shape into balls (about one inch in diameter) and chill for at least 2 hours.
- Melt candy melts in short intervals until smooth.
- Dip sticks into melted candy before inserting into each chilled ball.
- Fully coat each pop in melted candy and add decorations while still wet.
Nutrition
- Serving Size: 1 cake pop (45g)
- Calories: 150
- Sugar: 10g
- Sodium: 120mg
- Fat: 7g
- Saturated Fat: 2g
- Unsaturated Fat: 4g
- Trans Fat: 0g
- Carbohydrates: 21g
- Fiber: 0g
- Protein: 2g
- Cholesterol: 25mg